How to Create a New Production Order
Textual content is below video. To expand video click on the icon at the very bottom right of the video.
There are two types of production orders in influence FM:
- Standard PO – This is when you actually need to get a commercial produced
- Pre-Produced PO – This is when you have an ad that is ready to go on the air and needs NO editing at all. (If you have an ad that needs any kind of editing including a tag, jingle or any editing at all, use the standard PO feature)
Standard Production Orders (click to open)
Making a Standard PO (Screen Shot at Bottom)
There is one ad per Production Order:
Tip: If there is ever an issue that you want to fix or adjust while the ad is getting produced, you MUST click on the orange “Actions” button and choose “Report Problem”. This is the ONLY way to edit a PO!
![]() On the left side of you screen, click on the green “New” button and then select the third option “New PO”
On the left side of you screen, click on the green “New” button and then select the third option “New PO”
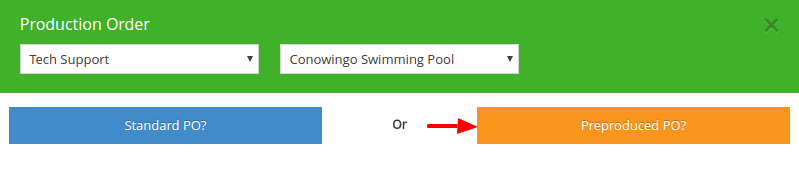
In the right drop-down box at the top of the pop-up screen, choose which customer the production order is for
You can either choose a “Standard PO” or a “Pre-produced PO”. For this example we are going to choose “Standard PO”.
A Standard PO means that you need an ad produced while a Pre-produced PO means that you already have an ad produced that MAY OR MAY NOT need more editing.
- Create a specific title for your ad so you are able to find it in the future (adding a date including a month and a year may help make it easier to find your ad at a later date)
- Select the length, voice style and number of voices you need for this production order
- Choose the dates that you would like it written and produced by (If you don’t have the “write by” date field, it means your company does not have this turned on)
- Check the “Co-op” button if that applies to this ad. If there is confusion on whether this option needs to be selected, ask your manager or traffic
- You can leave the “Cart” option empty, traffic will take care of that if this is not your job
- Under “Talent” you can request who you would like to have voice your ad
- “Needs” has four check boxes to choose from; Jingle, Tag, Music Bed and other. Check all that apply to this ad.
- Anything that may help the talent or production in making this ad should be put in the “Instructions” box and, if applicable, the “Pronunciations” box
- Under “Copy Points”, enter as much as you can to help the copy writer create the ad you need (If you do not have a copy box field, it means your company has this turned off)
- Next is the “Copy” box (If your company uses copywriters, you may skip this step. However, if you are the one writing the copy, go ahead and enter it in the copy box)
- If there are any “Additional Instructions”, you may enter that in the last text box on the form
- Once your Production Order form is complete, select “Apply” if you are ready to move on or “Save Changes” to come back to it later
- If your company uses copywriters, your Production Order will now move to the “Copy Writer” stage. If your company does not use copywriters, then it will go to the production status. (If you open the “Copy Writer” tab at the top of the screen, you will see your production order. On the bottom is a blue line showing what status the production order is in and what is next in the process.)
- Once the copy writer is done writing the ad, it will move to the “Approval” status where you can read the script and make sure your customer likes the copy. Tip: You can click on the orange “Actions” button and email the copy to your customer.
- You will not need to do anything until it gets to the “Complete” stage. At this stage, you can listen to the ad and send it off to the customer for their approval.
- Once you have received approval, select “Traffic” on the blue timeline at the bottom of the PO.
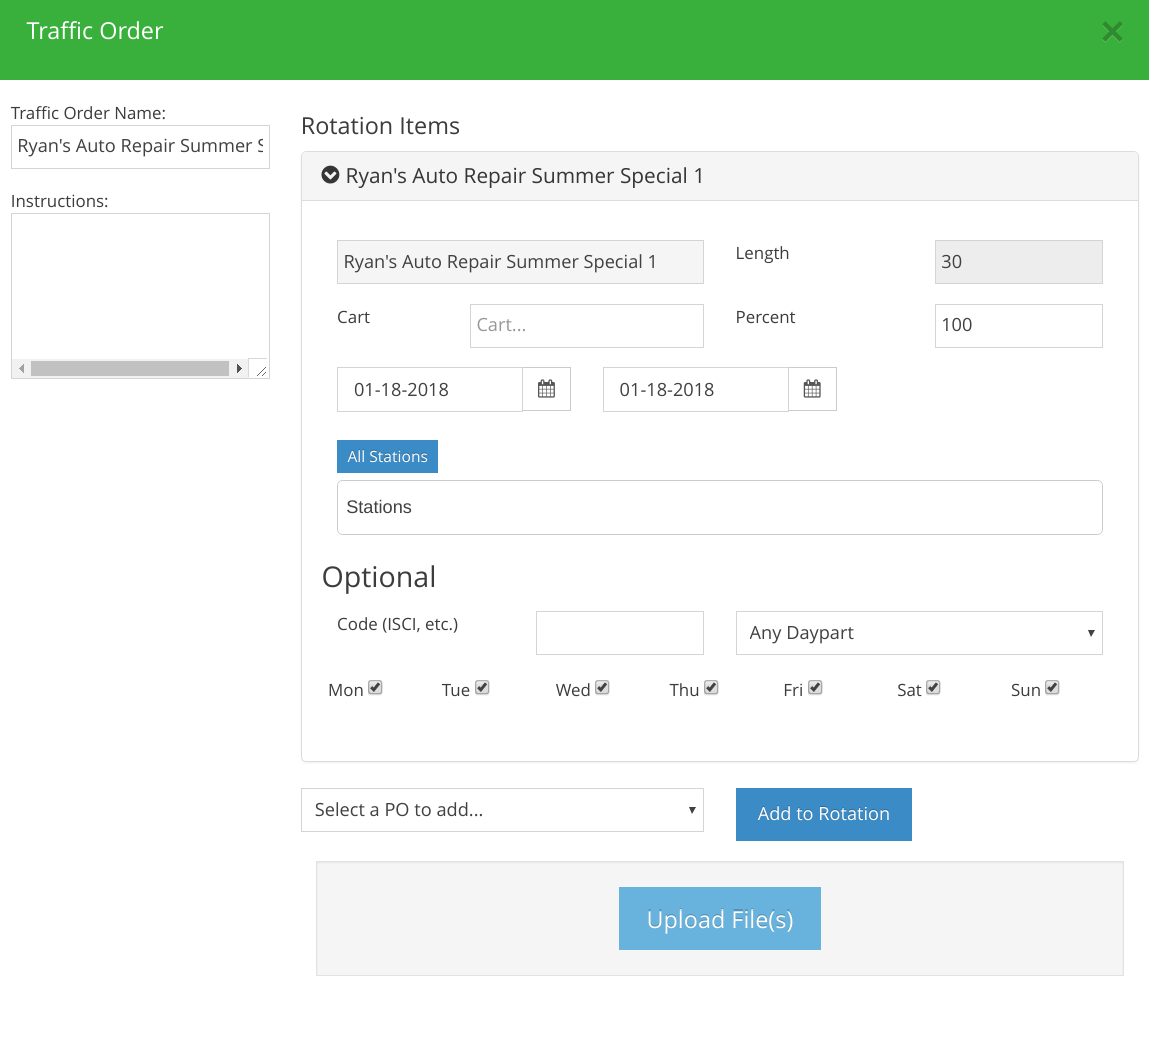
- A pop-up will appear, here you will create your Traffic Order.
- Under the “Percent” box is where you will choose the variation between the ads running. (For example if you had two adds you would do 50% or if you had one ad it would be 100%)
- Select the date range that these ads will be running for and the stations that the ads will be running on. (If this has not already been selected, it is because your company has the feature turned off to set run dates and stations before the PO is completed)
- Select the Daypart that these ads will be in and select what days of the week you would like them to play
- If you would like to add any other Production Orders to this Traffic Order, then click on the “Select a PO to add” from the drop down bar. Select which PO you would like to add, then click “Add to Rotation”
- Now you can “Save Draft” to save for later or “Send to Traffic”
- Once sent to traffic, they will handle the next step and move it to “On Air”
Pre-Produced PO Example Below:
New Traffic Order Example Below:
(watch an additional video tutorial below)
Preproduced Production Orders (click to open)
Making a Preproduced PO (Preproduced means that the ad is done and ready to go on the air)
There is one ad per Production Order:
 On the left side of you screen, click on the green “New” button and then select the third option “New PO”
- In the right drop-down box at the top of the pop-up screen, choose which customer the production order is for
- You can either choose a “Standard PO” or a “Preproduced PO”. For this example we are going to choose a “Preproduced PO”. A Preproduced PO means that you already have an ad produced that needs NO editing what so ever. It is 100% ready to go on the air!
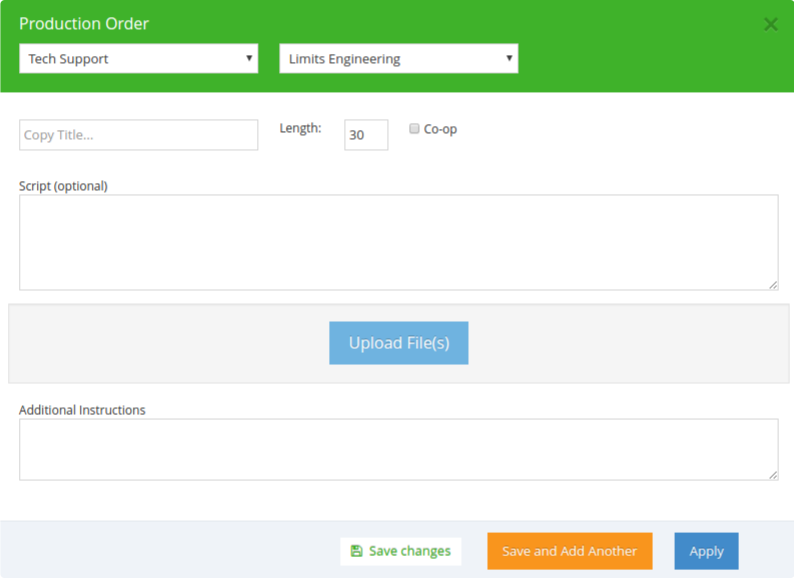
- Create a specific title for your ad so you are able to find it in the future (a general date including a month and a year may help you)
- Select the length of the ad in the box to the right of the title: i.e. 30, 60, 90 and so on
- Check the “Co-op” button if that applies to this ad. (If there is confusion on whether this option needs to be selected, ask your manager or traffic)
- Even though the “Script” box is optional, we highly recommend that you fill it in
- You will upload the audio file in the blue “Upload File(s)” button
- If there are any “Additional Instructions” you may put that in the last text box if you would like
- If there are multiple ads for this customer that need to run, select the orange “Save and Add Another“ button instead of the blue “Apply“ button. If not, click the blue “Apply“ button to send the Production Order to Traffic.