Welcome to influence FM’s connect CRM Calendar Training
Textual documentation is below video.
Adding a task from the calendar screen (click to open)
The “Task” Module is integrated into the calendar. To add a task from the calendar follow the directions below. (“Tasks” are only for duties that are NOT related to a customer)
Uses: The task system is intended for things such as internal meetings with management, radio station events/functions, or picking up donuts for the office. DO NOT use the task system for things that are related to a customer.
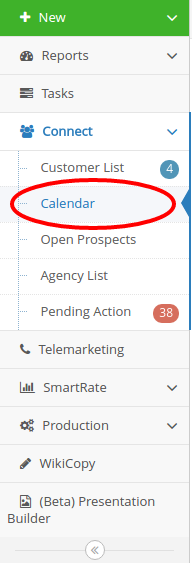
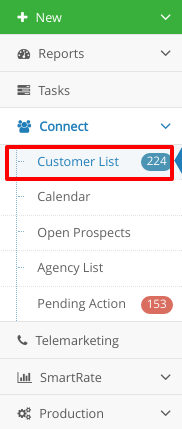
- Click “Connect” on the left side of the screen.
- Select “Calendar” (Note: you can also add tasks to the calendar from the “task” main interface pictured to the left, above the “connect” menu item. Using the main task interface is best for when you are power tasking which is adding a lot of tasks to your calendar. This is really handy for someone like a sales assistant, production or secretary.
- Click on the date and time on the calendar that you would like to make a task appear.
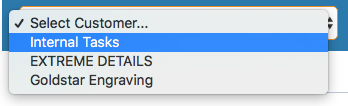
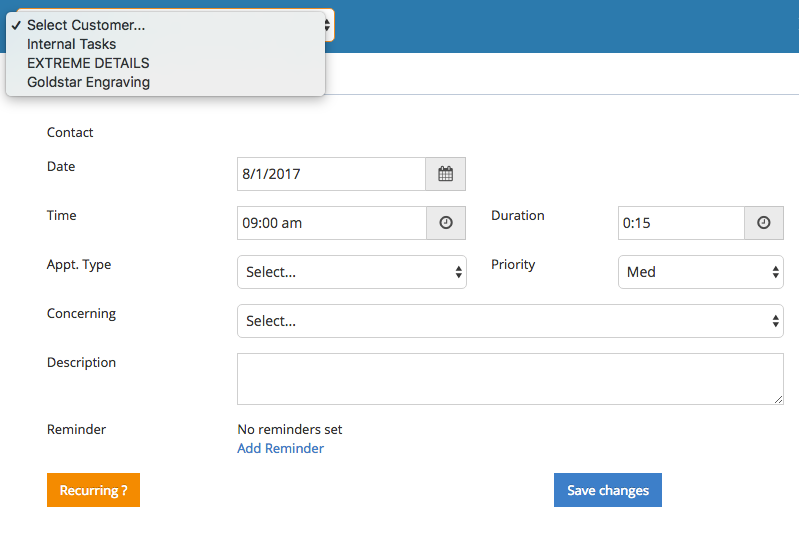
- Once the details open to the right of the calendar, click on the top drop down menu on the right side of the page that says “Select Customer” then “Internal Tasks” at the top of the new window. Tasks are used for anything that is NOT related to a customer like meetings with fellow staff members, events the station is putting on or running errands for the station.
- Fill out all the fields that apply to this task.
- Optional: You can create a reminder using the “Add Reminder” option so an email reminder will be sent to you.
- Optional: You can invite/involve anyone in the company to your tasks in the “Would you like to invite anyone?” section at the bottom. This will send them an email and put the task on their calendar as well.
- Finally you can click the blue “Save Changes” button at the bottom.
Tasks will not be created until you click on the blue “Save Changes” button
Different ways to view your calendar (click to open)
There are three different ways to view your calendar. You can find the options in the top RIGHT of the calendar screen pictured below.
- A single day
- One week
- An entire month

Click on image to enlarge
You can scroll through your calendar with the arrows on the top left side of the page
Creating an appointment (click to open)
There are two ways to create an appointment.
- From your calendar: click on the date and time you want to make the appointment for (Your calendar can be found on the left side of the screen under the “connect” menu)
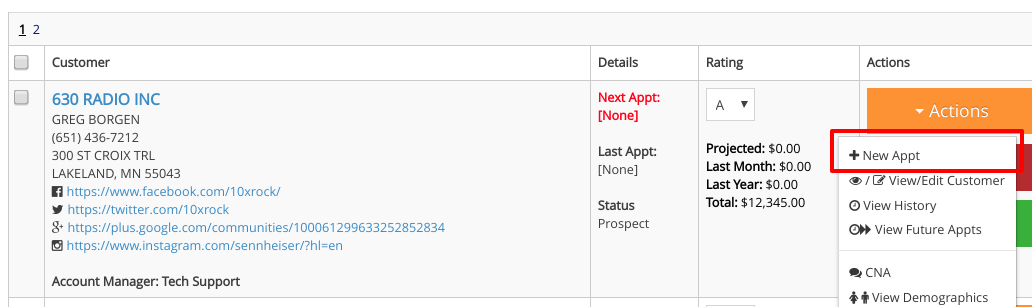
- From your customer list: Use the orange “Actions” button and select “New Appt” from the drop down menu (Your customer list can be found on the left side of the screen under the “connect” menu)
To add an appointment from the calendar:
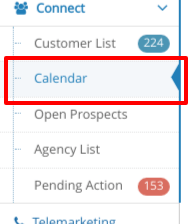
- Click “Connect” on the left side of the screen.
- Select “Calendar”.
- Click on the date and time you would like to make the appointment for.
- After clicking the date and time you choose, click on the drop down menu that says “Select Customer” on the pop up that slides out to the right of the screen.
- After filling out the “Appt Type” and “Priority”, then select what the appointment is concerning (Concerning types are decided by your manager. If you do not see the option you are looking for, speak with your manager). For any type of closing you MUST input the Contract Total for the contract amount regardless if it is an annual contract or not. In other words, what is the total that you will be asking from this customer on this appointment? After entering the total, there is a field to the right asking for your confidence level in percentage format. It is important to be honest when entering your “confidence percentage”. This will help your manager decide whether to help you with this closing.
- Optional: You can invite anyone in the company to your appointment in the “Would you like to invite anyone?” section at the bottom. This will send them an email and put it on the invitee’s calendar as well.
- Finally you can click the blue “Save Changes” button.
Appointments will not be created until you click on the blue “Save Changes” button
To add an appointment through the customer list:
 Under the “Connect” button on the left side of the screen select “Customer List”
- For the customer you are creating an appointment for, click the orange “Actions” button on the right. You will select the first option which is “New Appt”. Make sure you confirm that the correct business is selected at the top.
- You can adjust the date and time in which you would like the appointment to occur. The green “History” button is next to the date in case you need to see what has occurred in past history with this customer.
- After filling out the “Appt. Type” and “Priority” you will select what the appointment is “Concerning”.
- Enter appointment details in the “Description” box. You will be able to look back on this information in History and it will also be comprised in a report for your manager.
- Create your reminder using the “Add Reminder” option so a reminder will be sent to you via email.
- You can invite anyone in the company to your appointment in the “Would you like to invite anyone?” section. This will send the invitee an email and put it on their calendar as well.
- Finally, click the blue “Save Changes” button at the bottom.
Appointments will not be created until you click on the blue “Save Changes” button
Most Important!!! Completing an existing appointment (click to open)
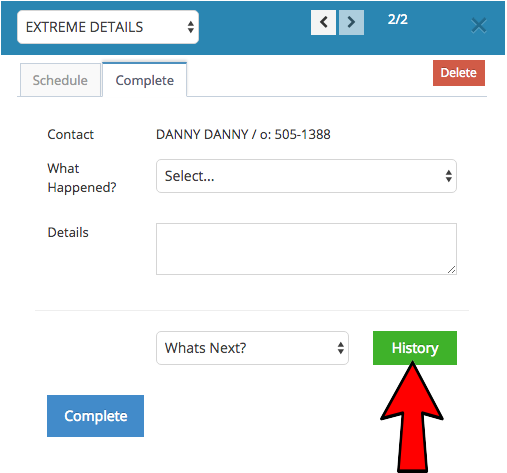
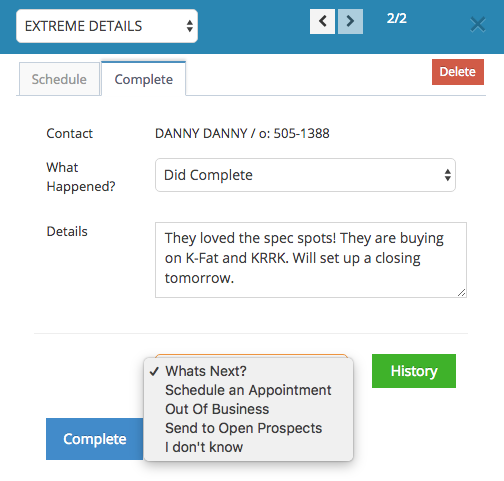
This is by far the most important component to influence FM’s calendar. In order to fill out your calendar correctly in influence FM, you must complete the current appointments you already have set. “Completing your appointments” means that you say what happened on that appointment with your client and also what is your next step with that client. Do this by clicking on that current appointment in your calendar. Make sure you are on the “complete” tab and describe what happened on that appointment. You must fill out the “what’s next” section of the calendar to complete that appointment.
Why? This is so you never forget to do anything for your clients and nothing slips through the cracks. As sales reps, you have very busy days and it can be easy to forget things. With this system, it forces you to do your next step at the same time. You may be thinking “I don’t always know what is next” which is fine, just put something on your calendar so you have a future appointment. You can always adjust the details on those appointments at a later date. As you get closer to those dates you will probably have a better idea of what you need to do and you can adjust the details. This is just putting something on your “radar” to make sure you always have a future action to take for that client.
 You must open your calendar to begin this step.
Completing an existing appointment:
-
- Once you are ready to report the outcome of a scheduled appointment, click on that appointment in your calendar.
- When you click on that appointment, a pop-up (to the right of the screen) will appear. Here you will fill in the details of what happened on that appointment.
- Next to “What Happened?” either select “Did Complete” or “Did NOT Complete” (We recommend that you reschedule the appointment instead of using the “Did NOT Complete” (this is up to your manager) An example of when you would use “Did NOT complete” is if a client is on vacation or in the hospital for an extended period of time. We suggest that you explain this to your manager in the details field and schedule the next appointment on an estimated date when you think you may see that customer again.
- Before you “Complete” the appointment, you MUST also select something under the “What’s Next?” drop down menu unless you simply need to reschedule the appointment. Those directions are under 4a. (pictured below) There are four options. 1st: “Schedule an Appointment” 2nd: “Out of Business” 3rd: “Send to Prospect List” 4th: “I Don’t Know”. The “I Don’t Know” choice does nothing. It’s just dialog that explains the philosophy of our calendar. Do note that your schedule is never set in stone. You can always adjust the appointment later. In sales, you don’t always know the exact time, details or date you will see your customer. Setting a future appointment ensures that your customer is on your radar with a next step. When it gets closer to that appointment, you will have a better idea of when you will be able to meet with your customer. At that point, you can adjust your calendar accordingly.
4a. You have two options to reschedule an appointment on your calendar.
1. Simply click and drag an appointment to the new date and time.
2. Go to the schedule on the appointment you have open and adjust the date and time.
Be sure to click the blue save button at bottom.
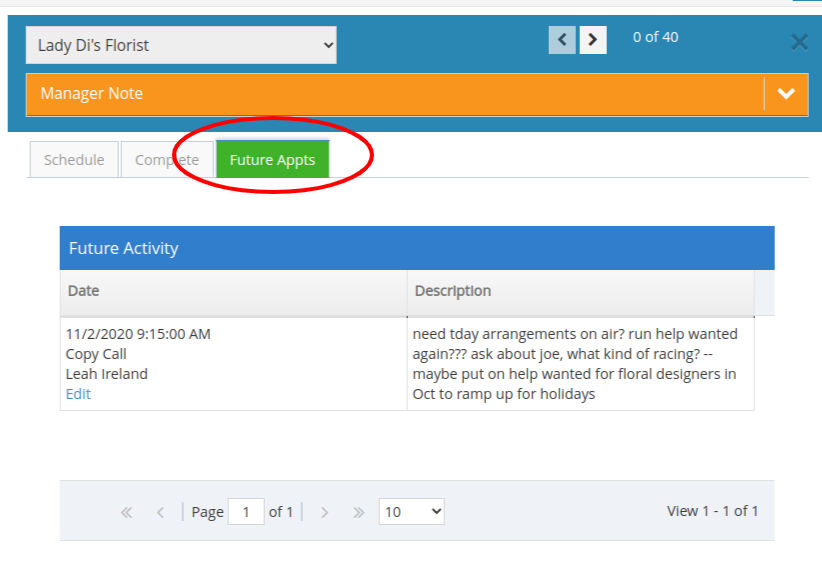
Future Appointments (click to open)
Future Appointments: Setting a future appointment ensures that your customer is on your radar with a next step. When it gets closer to that appointment, you will have a better idea of when you will be able to meet with your customer. At that point, you can adjust your calendar accordingly.
History: Click on the green “History” button to view the entire past history for that client. In history you will be able to see everything that has happened with that client and who did it. You will be able to see past promotions, what the conversations were with that customer, customers requests, etc. Nothing ever gets lost or deleted.
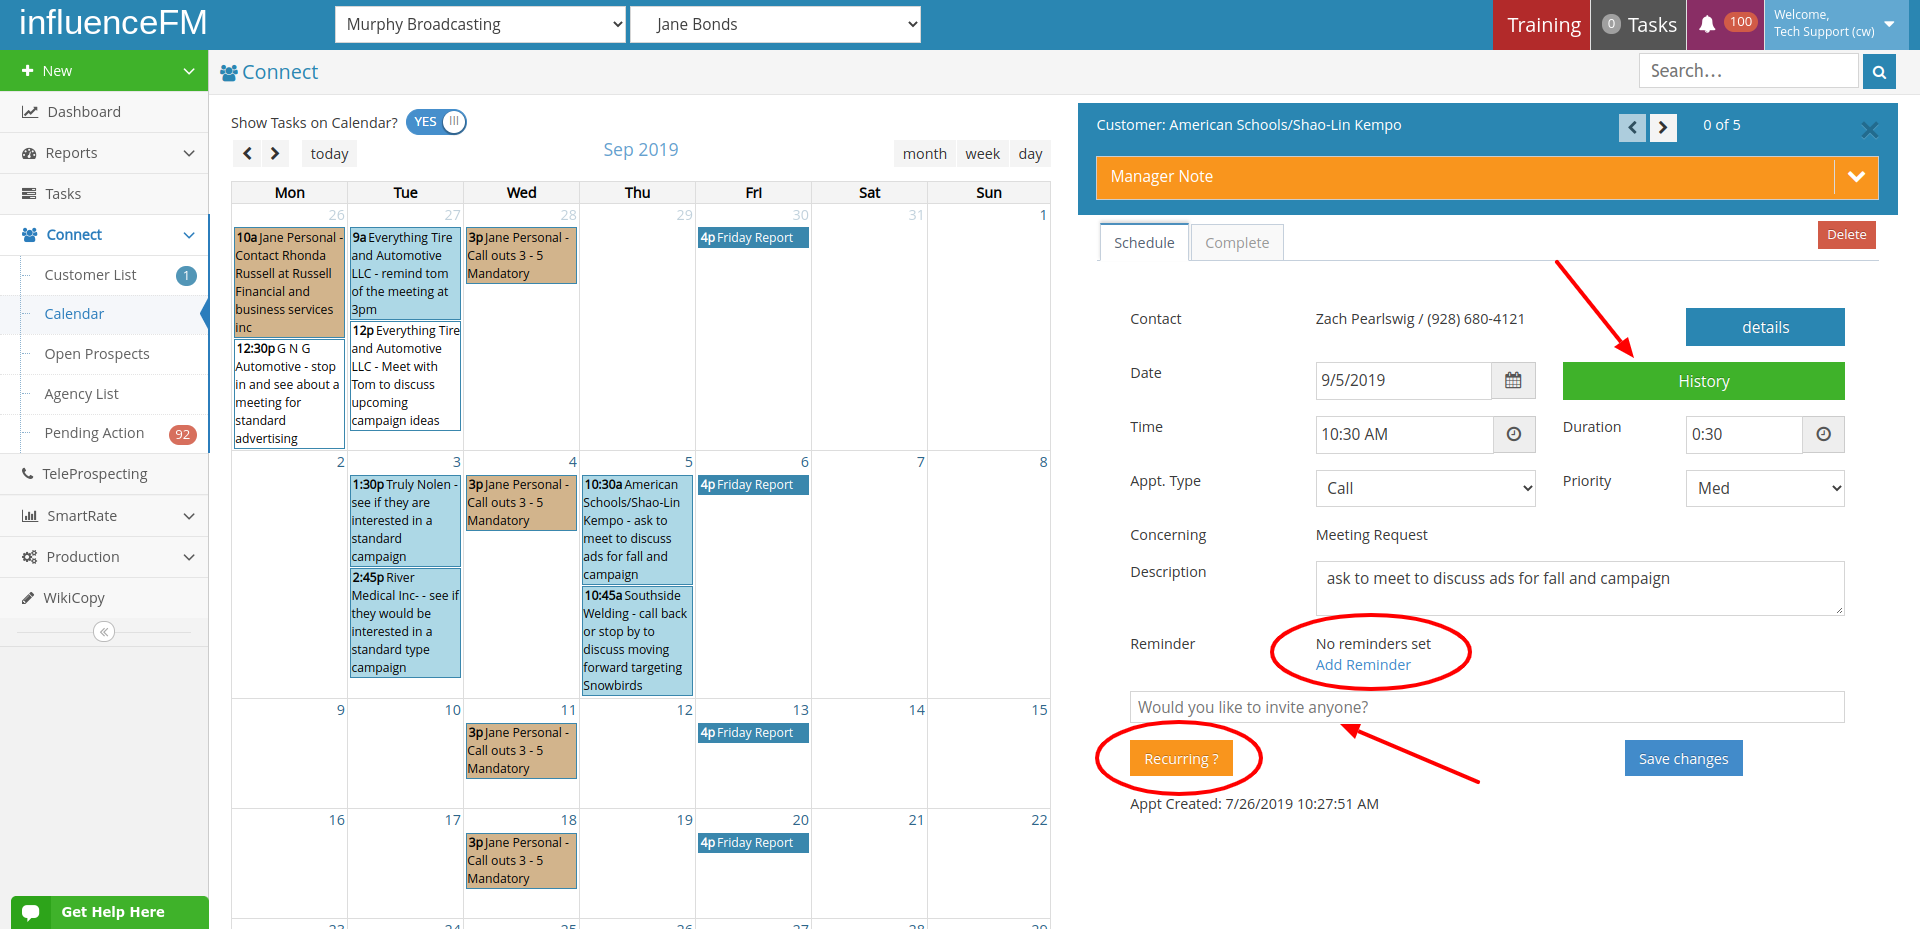
Reminders: Set reminders for customers so nothing ever gets forgotten.
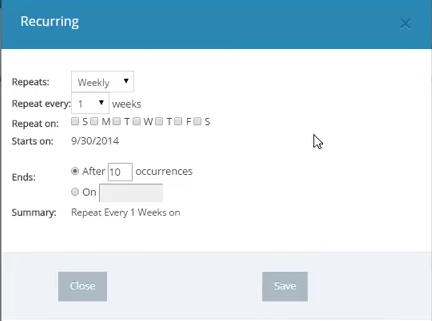
Recurring Events: Set recurring events so you will never forget about a special event on your schedule.
Printing your Calendar and what do the colors on the calendar represent? (click to open)
You must open your calendar to begin this step.
Printing your Calendar and what do the colors represent :
Once you are on your calendar page, scroll to the bottom and you will see a small print icon on the bottom left of your calendar, as seen in the picture below.
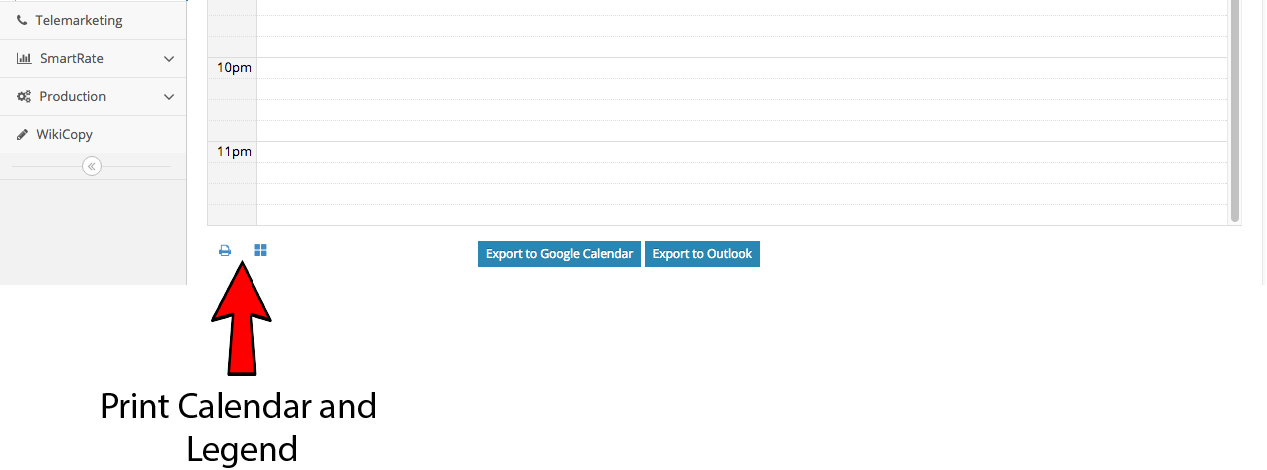
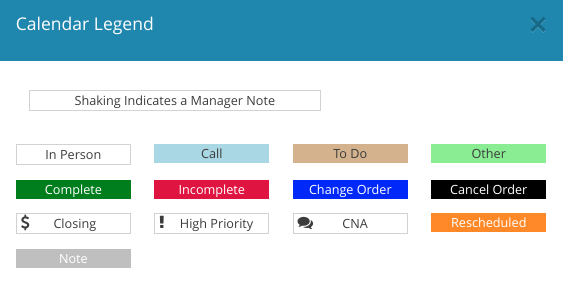
Legend:
The legend lets you know what the colors and the icons mean on the calendar. The legend is located just to the right of the printer icon and is represented by four small squares (pictured above)
Exporting your Calendar to Google and Outlook (click to open)
You must have a Microsoft Live account to export to your outlook. Click here to sign up if you use Outlook and do NOT have a Microsoft Live account.
Exporting your Calendar to Google and Outlook:
Exporting to Google
- Make sure that you are logged into your google account in the same browser you are accessing influence FM in, if you don’t have a google account click here.
- Scroll to the bottom of your calendar in influence FM and you will see a button that says “Export to Google Calendar.” Once you have done this, it will automatically export every hour.
Note that you can force export your appointments if you need it done immediately by clicking on the “Export to Google Calendar” button again. 
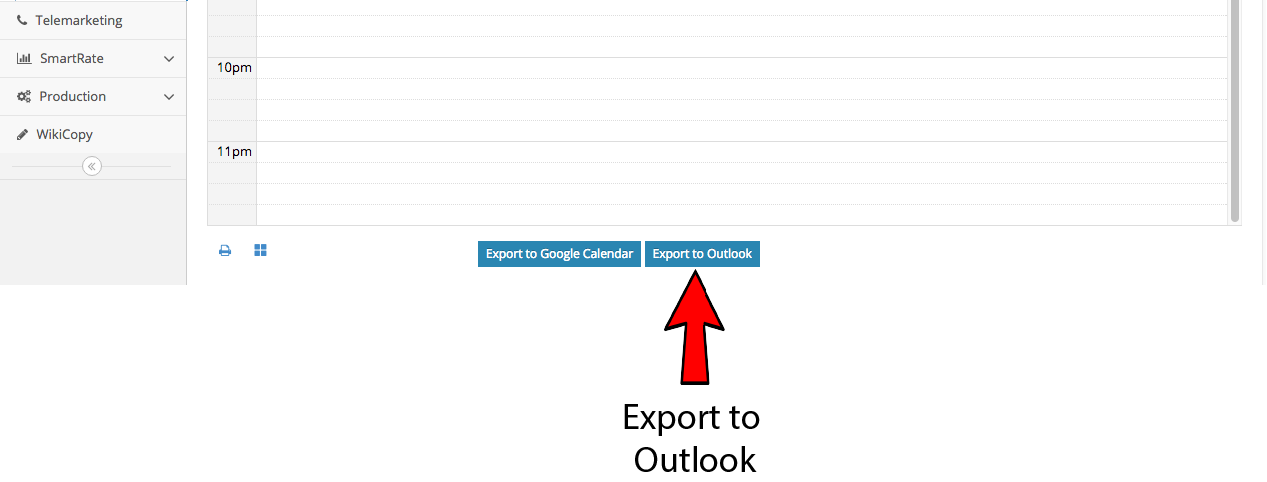
Exporting to Outlook (this can be tricky, please watch the video below and if you still need help, call us at 888-244-0436)
If you have a Microsoft Live account or Office 365, follow these steps. If you have Outlook installed on your computer and are not using Microsoft Live, please contact support through the chat system in influence FM or call 888-244-0436. (I am not sure! click here)
- Make sure that you are logged into your Microsoft Live account or Office 365 in the same browser you are accessing influence FM in.
- Scroll to the bottom of your calendar in influence FM. You will see a button that says “Export to Outlook.” Once you have done this, it will automatically export every hour.
Note that you can force export your appointments if you need it done immediately by clicking on the “Export to Outlook” button again.
Tips and Tricks (click to open)
Tips and Tricks:
- As you complete your appointments, the system will automatically bring you to your next appointment chronologically.
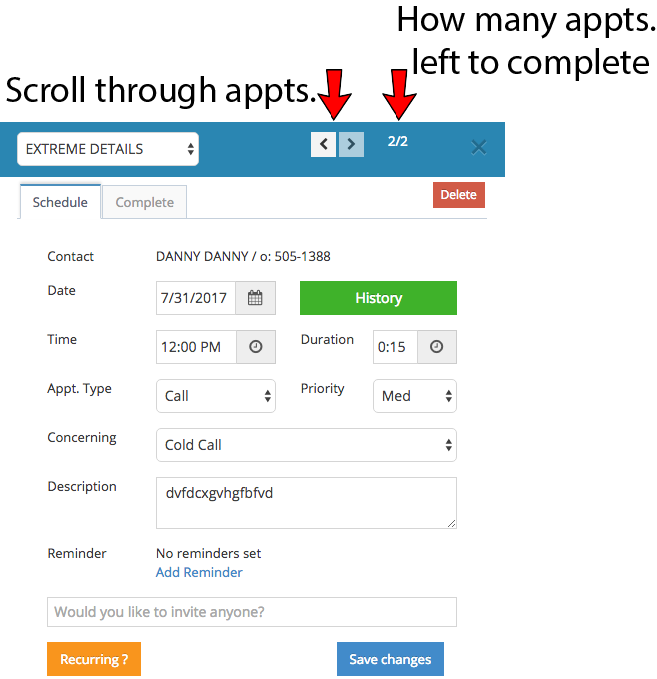
- You can also scroll through your appointments from the arrows on the blue bar above the open appointment. (Pictured below). You can also click directly on your appointment in the calendar to jump to them quickly.
- A great tool to use to make sure that you have completed all of your appointments and that you have a follow up appointment for all of your customers is to use the number system under the right arrow pictured below. As you can see in the example below, we are on the second appointment of the day out of the two that we needed to complete. As you complete these, the number will count down (your whole goal at the end of each day is to get this down to 0/0). Benefit: You can sleep better at night knowing that you have taken care of all of your appointments and have follow up appointments set for all of your customers.
Tip: There are many benefits to completing your calendar with thorough detail
- All of the information that you put in your calendar is compiled and emailed to your manager each night. You don’t have to explain every little detail to your manager every time you see them.
- You have a complete history of what you said to your customers in the past. Once you start juggling 80+ customers, it’s easy to forget what you have discussed with each one. Entering detailed notes makes you a better, more efficient sales rep and makes your customers that much happier with your service and attention to detail.
- Easily access the history of a client by clicking on the green “History” button on the pop-up appointment pictured below. This way you do not have to search through your calendar to see what you’ve said to that customer in the past.